

Maintaining your off-road motorcycle is essential for safe, reliable riding. This guide explains how to fix a dirt bike step by step, covering everything from basic tools to engine tuning, chain adjustments, and brake repair. We’ll start with prep work and common checks, then dive into each system: engine, chain, brakes, and more. Along the way we’ll use simple bullet lists and numbered steps to make the process easy to follow. By the end, you’ll have the confidence to tackle routine dirt bike repairs at home.
Get Ready: Tools and Safety First
Before you begin repairs, make sure you have the right equipment and a safe workspace. Learning how to fix a dirt bike starts with preparation: organize tools, wear safety gear, and stabilize the bike on a stand or lift.
- Clean workspace: Work in a clean, flat area. Place the bike on a sturdy stand to keep it steady. Disconnect the battery or spark plug if working near electrical parts.
- Safety gear: Wear gloves, goggles, and a mechanic’s apron if available. Protect your skin from oil, fuel, and cleaners.
- Lighting and airflow: Good lighting helps you spot problems. If you’re washing the bike or working with fluids, ensure proper drainage and ventilation.
What Tools Do You Need for DIY Dirt Bike Repair?
The right tools make every repair much easier. A well-equipped toolbox means more tasks you can do yourself. Here are the DIY dirt bike repair tools you should have on hand:
- Wrenches and sockets: Metric sockets and wrenches for axle nuts, engine bolts, and adjusters. At minimum, have 10mm–19mm sizes. A set of hex (Allen) and Torx wrenches is useful too.
- Torque wrench: Ensures critical bolts (like engine and suspension fasteners) are tightened to spec without overtightening.
- Chain tool and tension gauge: If you remove or break the chain, use a chain tool. A ruler or chain tension gauge helps measure slack accurately.
- Cleaning supplies: Chain cleaner, brushes, rags, and degreaser. A clean chain and engine allow you to spot issues like leaks or cracks.
- Miscellaneous: Screwdrivers, pliers, a drain pan (for fluids), and zip-ties or duct tape for clamping hoses. For larger engine work, consider an exhaust-spring puller and a micrometer (if checking piston wear).
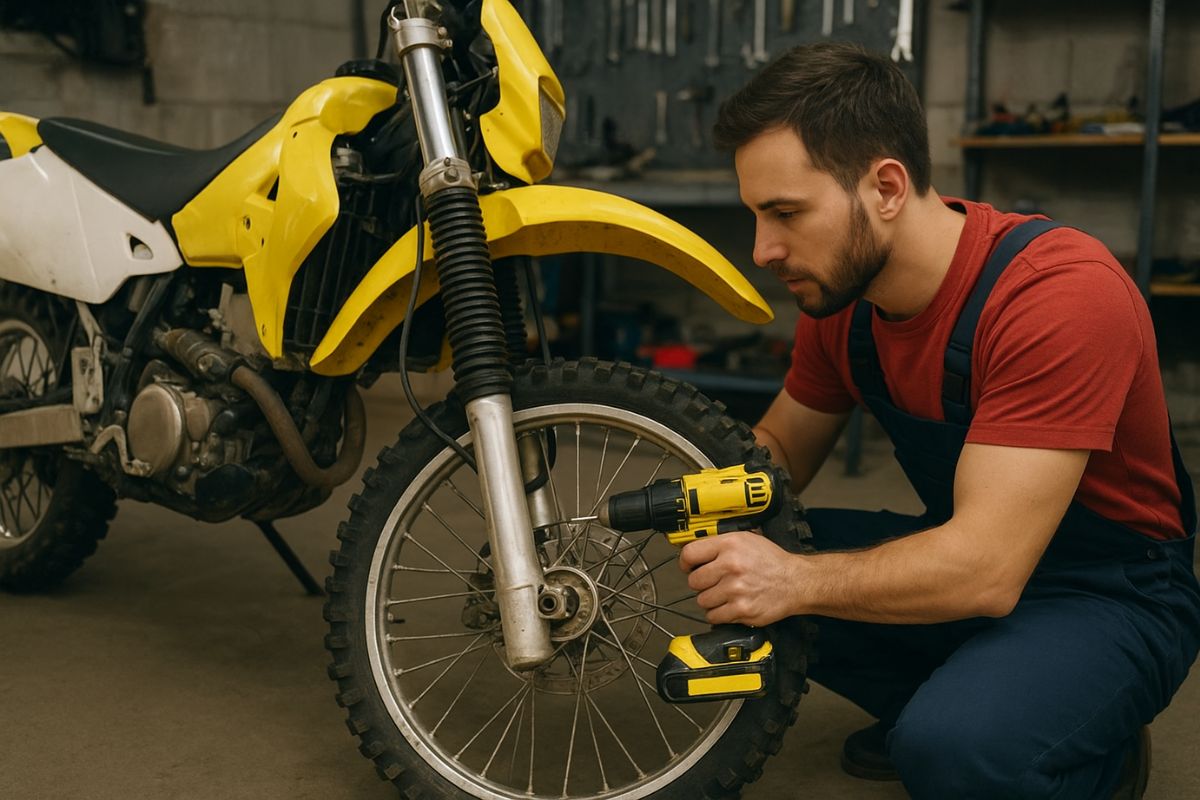
Mechanics performing dirt bike maintenance in an outdoor workshop, illustrating typical DIY dirt bike repair tasks. Having the right tools (wrenches, pliers, etc.) and a stable bike stand makes fixing the engine, chain, and other parts much easier. Always follow safety precautions when learning how to fix a dirt bike.
Step 1: Inspect and Troubleshoot Common Issues
Before jumping into repairs, do a thorough inspection. Many small problems can be spotted early and corrected before they cause bigger breakdowns. Knowing common dirt bike issues will guide your fix-it steps. Look for these in your pre-ride or post-ride check:
- Dirty bike: Off-road riding leaves mud and grime everywhere. Clean your bike after each ride. As AMSOIL notes, “wet mud and grit on your motorbike overnight will increase wear on all the dirt bike parts”. Cleaning the bike also reveals loose or damaged components.
- Loose parts: Check spokes, nuts, and bolts. Vibrations from trails can loosen fasteners. AMSOIL warns that failing to keep parts tight can cause accidents (“the bike’s back wheel coming off”). Check all nuts (axle, wheel, handlebar clamps) and tighten them to spec.
- Chain slack: A sagging chain is a frequent culprit. It should have about 1–2 inches of slack. If too loose, the chain can skip or derail; too tight, and it will wear bearings. Use the slack measurement method described below.
- Brake feel: Squeeze the brake levers. Spongy or long-travel levers may mean low fluid, air in the lines, or worn pads. As Partzilla notes, “when your dirt bike’s brakes [feel] getting spongy… the brake pads on the bike need to be changed. New brake pads are critical to getting your braking power and control back”.
At this stage, document what you find (loose bolt, oil leak, squeaky chain, etc.). This will guide your step-by-step repairs. If everything looks good, you can skip ahead to specific systems (engine, chain, brakes). Otherwise, address each issue methodically in the steps below.
Step 2: Engine Troubleshooting and Repair
A dirt bike’s engine is its heart. Basic engine problems often have simple fixes, but a tune-up may be needed. Follow these dirt bike engine repair tips to get your motor running strong again:
- Check engine oil and coolant: Most bikes (except 2-strokes) need frequent oil changes. AMSOIL advises to “feed [your engine] good quality dirt bike oil with regularity” for better performance and longer life. Always replace the oil filter when changing oil. For liquid-cooled bikes, inspect coolant level and condition. A good coolant “will go a long way in reducing engine temperature”. Low or old coolant can cause overheating.
- Inspect the air filter: A clogged air filter starves the engine of air. Remove and clean or replace it. If you’ve ridden in mud, clean and re-oil the filter properly. A dirty filter is a common issue that causes bogging or poor throttle response.
- Check the spark plug: Remove the spark plug and inspect it. A fouled, cracked, or corroded plug will misfire. Clean or replace the spark plug and ensure the gap is correct. (Using a plug socket, adjust the gap per your service manual.) Also check the ignition coil and wires for damage if you have no spark.
- Fuel system: If the bike runs rough, drain old fuel. Old gas can gum up carburetors or injectors. If your bike has a petcock (fuel valve), make sure it’s clean. For carbureted bikes, consider removing the float bowl to clean jets and passages.
- Valve clearance (4-stroke bikes): On 4-stroke dirt bikes, check valve clearance periodically (often every 20–25 hours). A loose valve can cause poor running or even bottom out the valve. Adjust clearance with a feeler gauge per the manual if needed.
- Final engine test: After maintenance, start the engine and let it idle. Check for smooth running at idle and under light throttle. Make sure no hoses are loose and the engine isn’t overheating. Listen for unusual noises.
If you encounter severe engine damage (like a seized piston or cracked case), a top-end or full rebuild may be required. For example, AMSOIL’s rebuild guide for two-stroke engines emphasizes the correct disassembly order: “loosen the [cylinder head] bolts in a star pattern” to prevent warping. They also list specialized tools needed (torque wrench, cylinders gauges, etc.). For most routine fixes, however, focus on the items above first.
Step 3: Chain and Sprocket Maintenance
The drive chain and sprockets transfer power from engine to wheel. A sloppy or worn chain can suddenly break or derail. Follow this Dirt bike chain fixing guide to ensure smooth power delivery:
- Gather chain tools: You’ll need wrenches to loosen the rear axle nut and chain adjusters. A chain breaker tool is handy if replacing the chain. Have a ruler or chain-tension gauge ready to measure slack.
- Clean the chain: Before adjusting, clean off debris. Use a chain cleaner and brush to remove dirt between links, then wipe or rinse. This lets you inspect for wear (rust, kinks) and makes lubrication more effective. AMSOIL notes that regular cleaning and inspection after rides makes spotting issues much easier.
- Measure chain slack: Find the tightest point on the bottom run of the chain (usually near the rear sprocket) and use a ruler or slack gauge. Most dirt bikes require about 1–2 inches (25–50 mm) of vertical movement. Consult your manual for the exact spec.
- Loosen rear axle: Use the correct size socket to slightly loosen the rear axle nut. This frees the wheel so you can adjust tension. Support the wheel so it stays straight.
- Adjust chain tension: On each side of the axle are chain adjuster bolts. Turn both adjusters the same amount to either tighten (turn forward) or loosen (turn backward) the chain. Do this gradually: tighten a click or two on each side, then re-measure slack. You want equal tension on both sides so the wheel stays aligned.
- Tighten everything: Once the correct slack is achieved, tighten the axle nut back to the specified torque (usually 50–80 ft-lb, check manual). If you have a torque wrench, use it to avoid over-tightening. Double-check the chain slack one more time after tightening.
- Lubricate chain: Apply a dirt bike-specific chain lube or oil to all links, letting excess drip off. Proper lubrication reduces wear dramatically.If your chain or sprockets are excessively worn (notice sharp teeth or kinks), replace them. A new chain, properly sized to the sprockets, ensures longevity. Always follow up with another quick check after the first few rides, as chains often settle into a new tension.
Step 4: Brake Inspection and Repair
Reliable brakes are a safety must. Follow this Dirt bike brake repair routine to keep your stopping power strong:
- Inspect brake pads: Look through the caliper or wheel hub to see pad thickness. As Partzilla notes, if brakes feel spongy or require extra lever force, worn brake pads are likely. New pads should restore firm, strong braking. Replace front and rear pads if any are below the minimum thickness (check your manual) or contaminated with oil.
- Clean brake components: Remove wheels to access calipers and rotors. Wipe pads and rotors with isopropyl alcohol to remove dust or oil (never grease a rotor!). Check for uneven pad wear or a glazed surface, which may require pad and/or rotor replacement.
- Brake fluid bleed: Brake fluid can absorb moisture, reducing effectiveness. Dennis Kirk emphasizes that brake fluid “absorbs moisture over time, causing it to have a lower boiling point and less stopping power”. If your brakes feel soft, bleed the system with fresh DOT brake fluid per your manual’s procedure. A basic method is to crack the bleeder screw and pump the brake lever, catching old fluid until clear fluid flows. Always keep the master cylinder topped up while bleeding.
- Check brake lines and hardware: Inspect hoses or cables for cracks, and make sure banjo bolts and bleed valves are tight (use a small amount of copper paste on bolts to prevent leaks). For drum brakes (on some rear wheels), ensure the springs and shoes are intact and adjust the drum if needed.
- Lever and pedal adjustments: Confirm the brake lever and pedal have proper free play. Often there’s an adjustment screw to set the lever throw. Too much free play means slow engagement.
After service, test the brakes at low speed in a safe area. The lever should feel firm when pulled. As Partzilla said, “New brake pads are critical to getting your braking power and control back”. Don’t ride aggressively until you’re satisfied the brakes are working perfectly.
Step 5: Tires, Suspension, and Final Checks
With engine, chain, and brakes in check, address the rest of the bike:
- Tires: Inspect for cuts, nails, and proper tread depth. Check tire pressure (usually around 12–15 psi for off-road). Soft tires improve grip but avoid bottoming wheels. Patch any leaks or replace severely damaged tires.
- Spokes: Tighten any loose spokes to maintain wheel integrity. A clicking sound can indicate a loose spoke.
- Suspension: Ensure fork oil is fresh (every 20–50 hours) and that the forks/ shocks move smoothly without binding. Check that spring preload and damping (if adjustable) are set for your weight. A sagometer is ideal for measuring spring preload.
- Final fluid checks: Double-check oil, coolant, and brake fluid levels. Top off if needed with the correct type (use high-quality oil and coolant as recommended).
- Test ride: Take a short, cautious ride to test everything. Listen for unusual noises and feel how the bike responds. After riding, re-check key items: chain tension, oil leaks, and brake performance. It’s normal to make small adjustments (e.g. a tiny chain tweak) after the test.
If you fixed a specific issue (like a flat tire or a broken part), verify that it’s fully resolved. For electrical issues, check the wiring harness, fuses, and lights if equipped. Keep a maintenance log of what you did and when; this habit helps schedule the next service.
Common Dirt Bike Issues to Watch For
Even with regular upkeep, some problems recur. Be aware of common dirt bike issues so you can identify them quickly:
- Engine overheating: This can be due to low coolant (on liquid-cooled bikes), a clogged radiator, or oil starvation. Make sure the radiator fins aren’t blocked by mud and that coolant is fresh. For air-cooled engines, avoid prolonged idling and consider adding fins or a cooling fan.
- Electrical glitches: A bike that won’t start might have a disconnected kill switch, weak battery, or damaged wiring. Check the spark plug, kill switch, and fuses first.
- Chain noise/slippage: If your chain jumps or makes noise, re-examine tension and lubrication. A leaking rear hub seal can splash oil on the chain, attracting grime. Clean and re-lube frequently.
- Suspension wear: Worn fork seals cause oil leaks and poor damping. Replace seals and fork oil as needed. If the bike bottoms out easily, increase spring preload or check for broken springs.
- Air filter blockages: A clogged air filter chokes the engine. Clean/replace the filter after every ride in dusty conditions to avoid sputtering or loss of power.
- Clutch issues: A dragging clutch or slipping gears may mean the clutch plates are worn or need adjustment. Follow your manual to adjust cable free play or rebuild the clutch if necessary.
- Brake drag: If the rear brake is dragging, it might be misadjusted or the return spring could be weak. Adjust the brake pedal free play or replace the spring to ensure the shoe retracts fully.
By inspecting these items regularly and fixing them early, you prevent bigger failures. For example, AMSOIL warns that ignoring simple tasks like cleaning the bike can cause “nasty service bills” later. A proactive approach keeps your bike running longer and more reliably.
Frequently Asked Questions
Q: How often should I adjust my dirt bike chain?
A: Check and adjust chain tension every 5–10 rides, depending on terrain. Off-road riding stretches the chain faster, so after a heavy ride, re-measure slack. A quick check each pre-ride is best practice.
Q: What happens if my chain is too loose?
A: A loose chain can slap and derail. If it comes off the sprocket, it could lock the wheel or jam in the swingarm, posing a safety hazar. Always maintain the recommended slack (about 1–2 inches).
Q: Can I adjust the chain without special tools?
A: You need basic tools (wrenches) to loosen the axle and adjusters. A torque wrench is highly recommended for the final axle nut torque. A ruler or slack gauge isn’t mandatory (a ruler works fine), but it ensures accurate adjustment.
Q: What tools do I need for basic dirt bike repairs?
A: At minimum, you’ll use wrenches (including Allen keys), pliers, screwdrivers, and a torque wrench for safety. For chain work, a chain tool and a ruler or gauge for measuring slack. Have cleaning supplies and spare parts (filters, plugs, fluids) on hand for maintenance.
Q: How often should I replace brake fluid on a dirt bike?
A: Brake fluid degrades over time. As a rule of thumb, change it every couple of months or at least once a season. If you ride a lot or do brake-dragging (such as heavy braking downhill), bleed the brakes even more often to ensure solid stopping power.
Q: What are common dirt bike problems to watch for?
A: Many riders encounter similar issues: a dirty/clogged air filter causing power loss, chain slack or wear, spongy brakes from worn pads or old fluid, and loose bolts from vibration. For example, leaving mud on your bike “will increase wear on all the dirt bike parts”. Worn brake pads will make braking weak. Regular inspections catch these before they become failures.
Conclusion
Fixing a dirt bike yourself is totally doable with the right approach. This step-by-step guide covered the essentials of how to fix a dirt bike, from gathering DIY dirt bike repair tools to troubleshooting engine, chain, and brake issues. Remember to follow each step carefully, consult your owner’s manual for specifications, and work methodically.
Routine maintenance is key: keep the bike clean, check critical items (oil, coolant, chain slack) often, and address problems promptly. Doing so not only saves money, it makes riding more enjoyable and safe. As AMSOIL reminds us, staying on top of maintenance prevents “nasty service bills” and keeps the bike in good shape.
We hope this guide empowers you to tackle your next repair with confidence. If you have questions or tips of your own, leave a comment below. Share this article with fellow riders who want to learn how to fix a dirt bike like a pro. Safe riding and good wrenching!
Previous Post:How To Change Dirt Bike Oil At Home, How To Make A Dirt Bike ,How To Change Dirt Bike Oil

1 thought on “How To Fix a Dirt Bike Step By Step: The Ultimate DIY Guide”